
How to ride a horse - Part I
6 Principles for learning to ride a horse
Learning to ride a horse is a wonderful thing and once you bond with a horse and the love of riding, especially in the countryside, you will never give it up, but it also requires understanding a few things first.
Horse riding is a physical activity and requires our body to learn to move and to be on the back of a moving horse.
This is not something you learn by watching TV or reading a book, although I must say that written or filmed techniques are important to remember and keep in mind.
However, what is more important for learning to ride a horse is to practice the techniques in such a way that we execute them with increasing precision, without letting this become an exhausting rigor, but rather in the satisfaction that we feel when our riding techniques improve.
It is a great pleasure to feel that we are harmoniously accompanying the movement of our horse in a comfortable and safe way.
To learn horse riding techniques it is important that someone teaches us and that someone is the duly qualified riding instructors found in the different equestrian centers. These people will guide us and will be the ones who, when they see how we execute the riding techniques, will correct us, thus preventing us from deepening or consolidating erroneous movements and positions, which, once incorporated, are difficult to eradicate.
Many of us have learned since we were children, perhaps in the countryside, to get on a horse and looking at others, through our own experience we have ended up riding a horse with a certain degree of skill, but this way of learning will give us the ability to ride a horse intuitively, without knowing that we can get more out of the man/horse combination if someone trained teaches us.
Anecdote about Don Álvaro
On one occasion, Don Álvaro Domecq Díez, an extraordinary Spanish horseman and bullfighter on horseback, was being watched by a spectator, and seeing how Don Álvaro performed all kinds of movements with his horse with great precision, the spectator asked him:
Don Álvaro, how do you manage to handle that horse like that?
And he said: “If you want to know how I do it, take a good look at my hands and legs”.
At the end of the practice, the spectator said to him Don Álvaro:
I did what you told me: I looked closely at your hands and legs but I saw nothing.
Don Álvaro replied: Then I'm doing things right.
“When the technique of horse riding reaches its maximum expression through talent and practice, the signals that the rider transmits to his horse are imperceptible to the eye.”
Horse riding brings physical, mental and emotional benefits
Physical because when riding, just like when you are riding a bicycle, you have to move a series of muscles to maintain your balance and also to accompany the horse's gait.
Mental because horse riding is a lifelong learning process and science has shown that the brain that is constantly learning generates many more neural connections which, among other things, help to maintain memory.
Emotional, because the connection and understanding needed to ride a horse brings us closer to nature, especially if we ride in it, allowing us to feel emotions of tranquillity that do not relax the daily stress of the city.
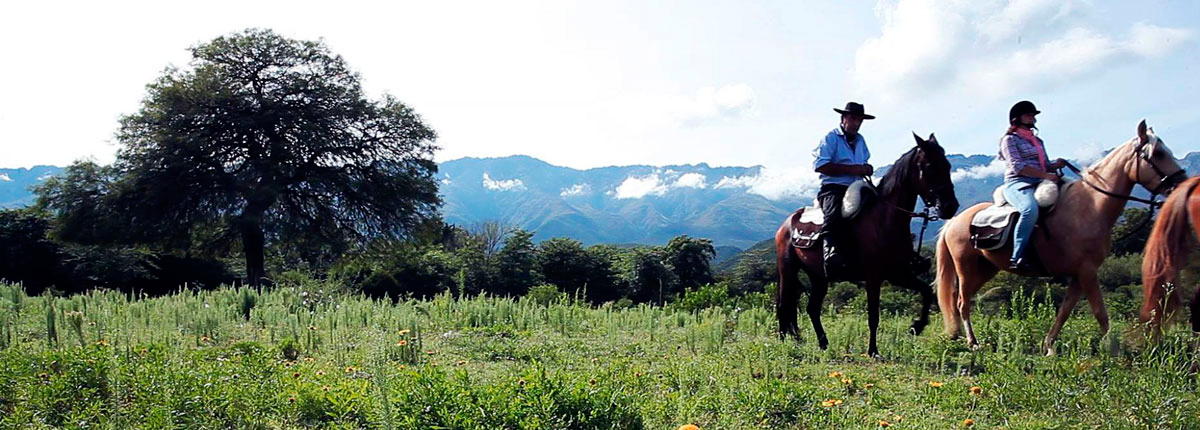
Below we will look at 6 basic points to keep in mind in order to bond with horses and ride them correctly.
These topics will be covered in two posts, this being the first. In both parts of this post, the topics raised will be treated at an informative level and clarifying that each of the 6 topics mentioned are developed at a very introductory level, aimed at people who want to learn how to start riding a horse and that, as we said before, it is important that someone teaches us how to do it.
1. BEFORE YOU START HORSERIDING
Before you start riding you should learn how to relate to the horse and for that you should know how to catch your horse if it is in the field, how to tie it, how to make it walk by your side by pulling on a rope, how to clean it and prepare it to be ridden.
This will increase the enjoyment of the relationship and will allow you to increase your confidence in what you are doing with the horse, and above all to handle your horse whether you go out riding alone or with a group of riders.
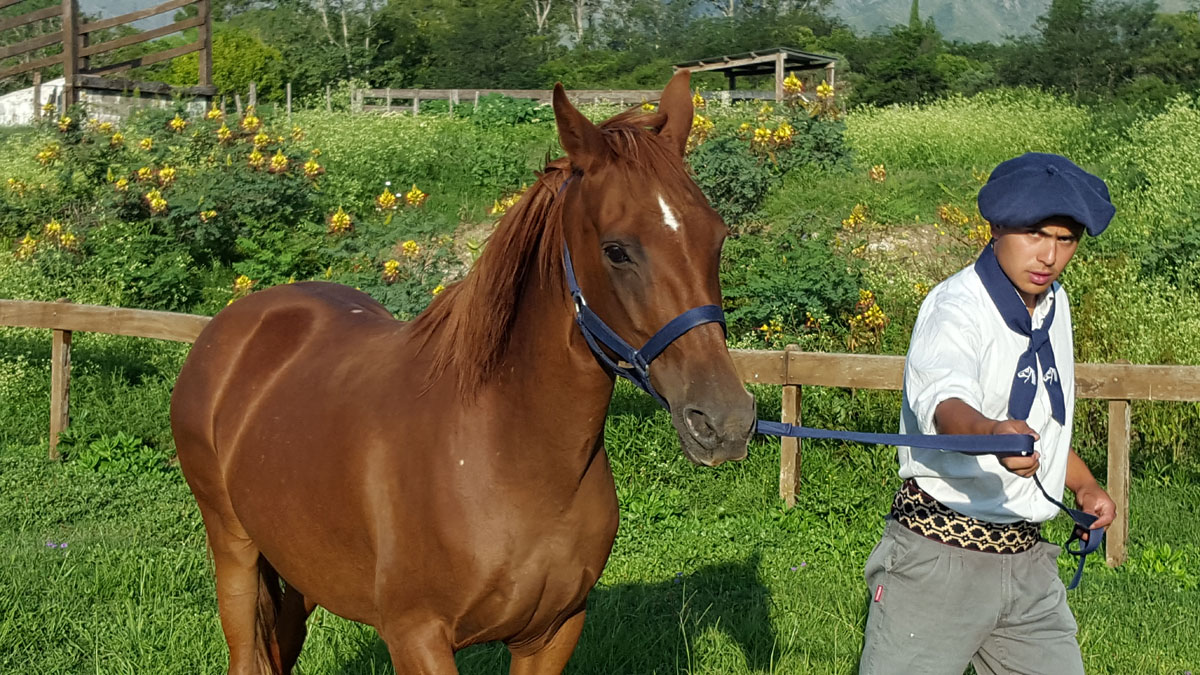
Gripping the horse
To catch a horse in the field it is important to approach it, not head-on but from the side, in an indifferent manner as if you were going to pass by, with a muzzle and rope in your hand, and approach calmly but decisively and when close start to stroke its neck in such a way that allows you to pass the rope of the muzzle over its neck and then put the muzzle on so you can lead it.
If the horse moves away from you, let it move without running or shouting, and with patience only, approach it again until you manage to hand it over.
With some more difficult horses, you can resort to giving them things they like, like something sweet or grains, so that when they see you with the grain bag, the horse will approach you on its own initiative and you can catch it. Of course, like everything in the relationship with horses, it takes practice.
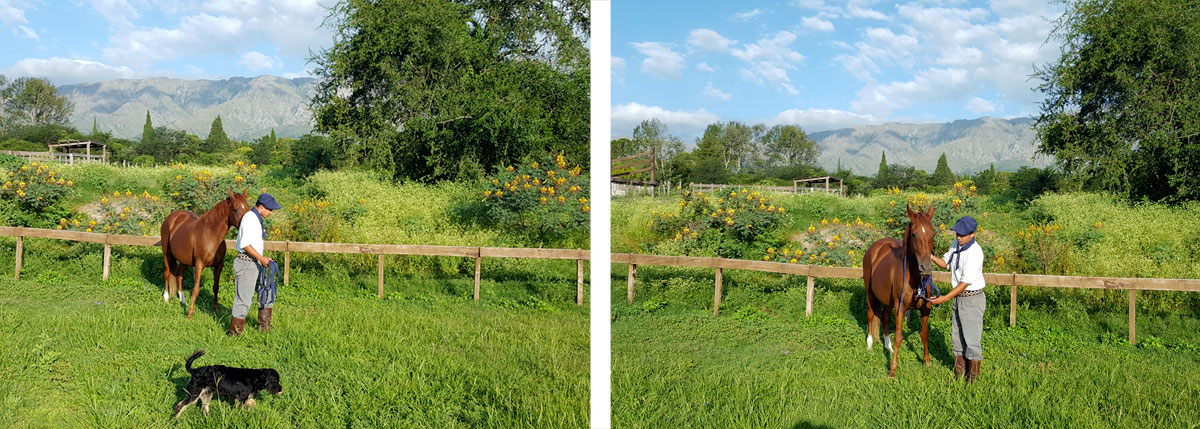
Guiding the horse with a rope
Once you have grabbed your horse and have it with a rope that is attached to the bottom of the halter or muzzle, you must learn the first maneuvers so that the horse walks next to you instead of having to drag it. In other words, we begin to learn how to do this, which, although it is easy, we must do well.
To do this you will start to apply a principle of learning theory: “The horse receives a stimulus through pressure, and it tries to get rid of it, and to do so it will try a response that is the one you expect”, for example, that it will walk beside you.

If this happens, you will loosen the pressure and thus, practicing this technique, which of course an instructor will teach you in detail, the horse will begin to walk by your side just by pulling it by the rope that hangs from the halter or muzzle.
Tying up the horse
Once you can walk the horse by your side, you should be able to tie it to a fixed place, both to be able to clean it and to be able to put the saddle on it.
To tie it to a place, you will do it using the rope that you have attached to the muzzle or halter. You must tie it to a very solid place and at a height high enough so that the rope does not hang down and be stepped on by the horse, nor too high so that the horse's head is restricted from moving.
Some people argue that the horse should not be tied with solid knots, because if, for some reason, the horse gets scared and panics, it could pull on its tether and it could break, freeing the horse.
At Ampascachi we always believe that the ties should be firm and correct, to avoid injury to the guide or the horse, and that the horse should not be able to escape if it pulls on the tie, thus preventing the expression of an attempt to flee, a situation that is very detrimental to the management of its behavior.
To explain and substantiate this opinion, we would have to go into great depth on the theory of learning, which is beyond the scope of this post, but our opinion, based on science, practice and experience, is valid.
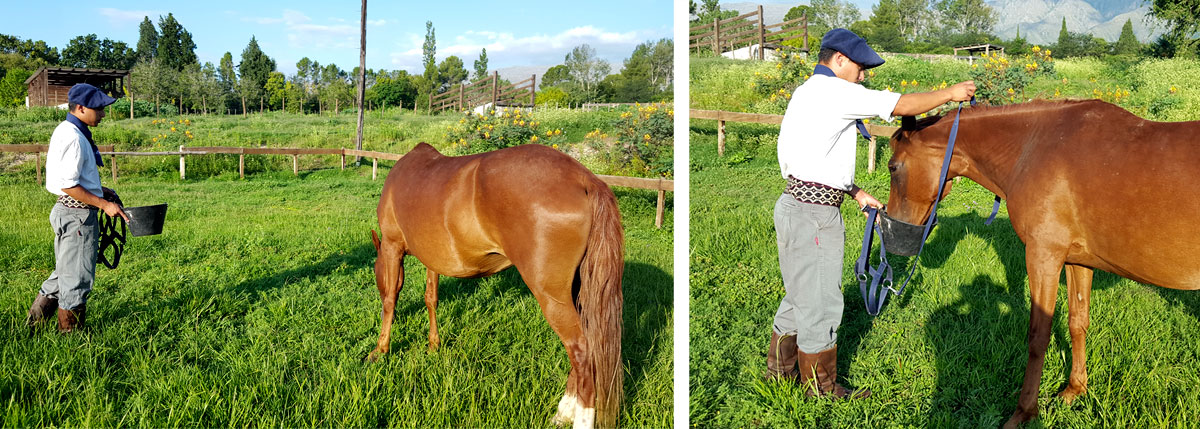
Cleaning the horse
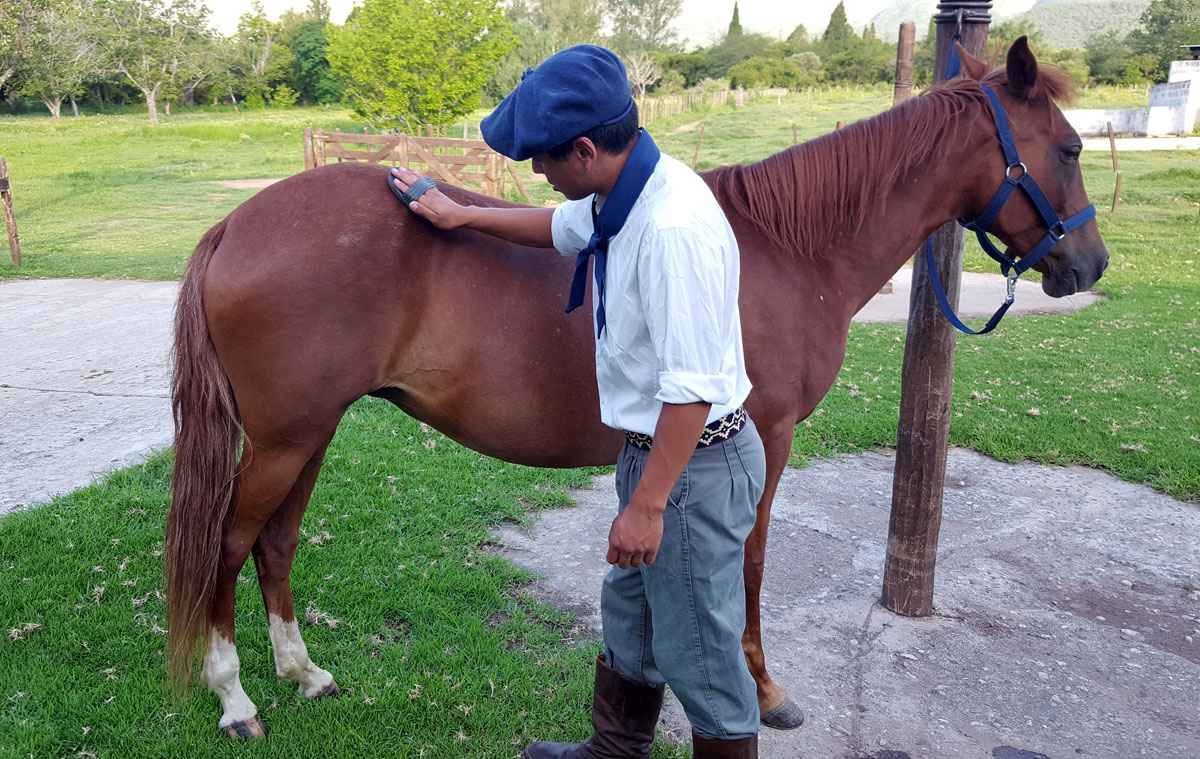
To prepare your horse, before saddling it, you should always clean its body and hooves. This is an activity that, apart from increasing your connection with the horse, is also useful for checking if the horse has any kind of injury or is in any pain.
Cleaning the body consists of removing the mud or sand stuck to the body and for this a solid scraper is used, preferably plastic, which allows you to scrape and thus loosen the dirt attached to the horse's hair.
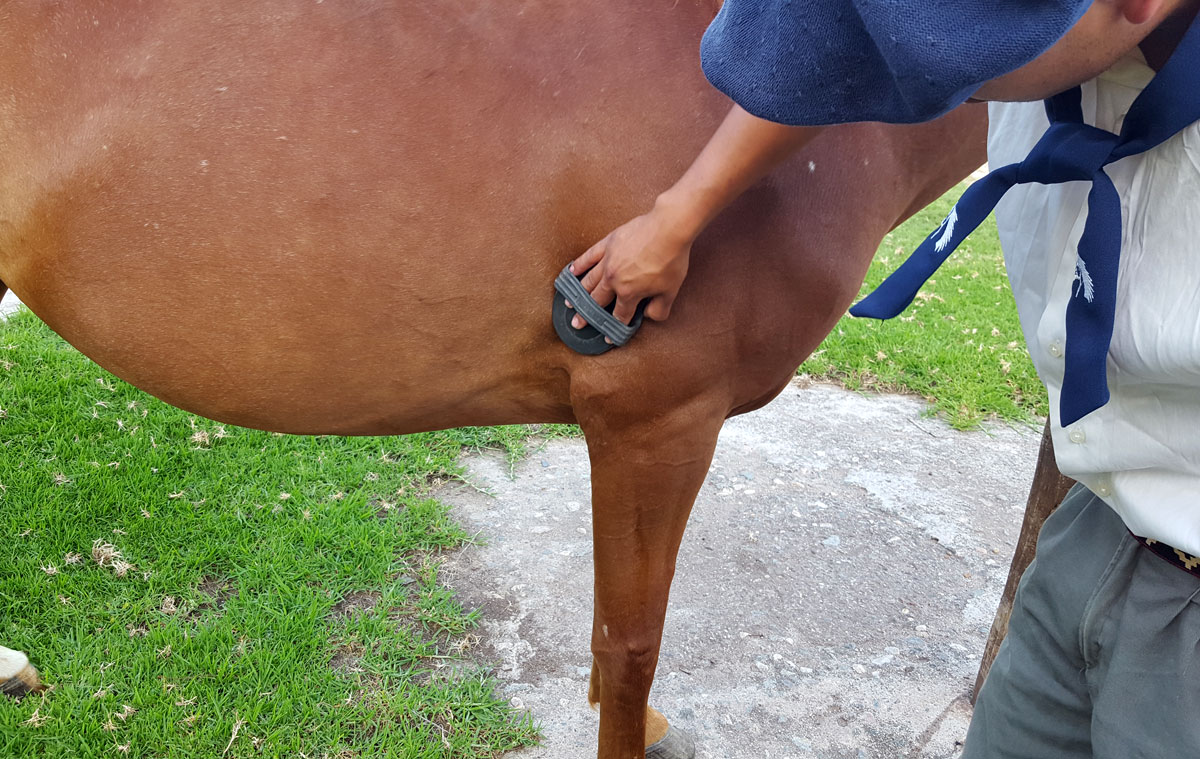
Be careful in areas with protruding bones and on the lower extremities. In these areas it is preferable to use a body brush that is softer than the solid scraper. The work is finished by removing any remaining dust with bristle brushes.
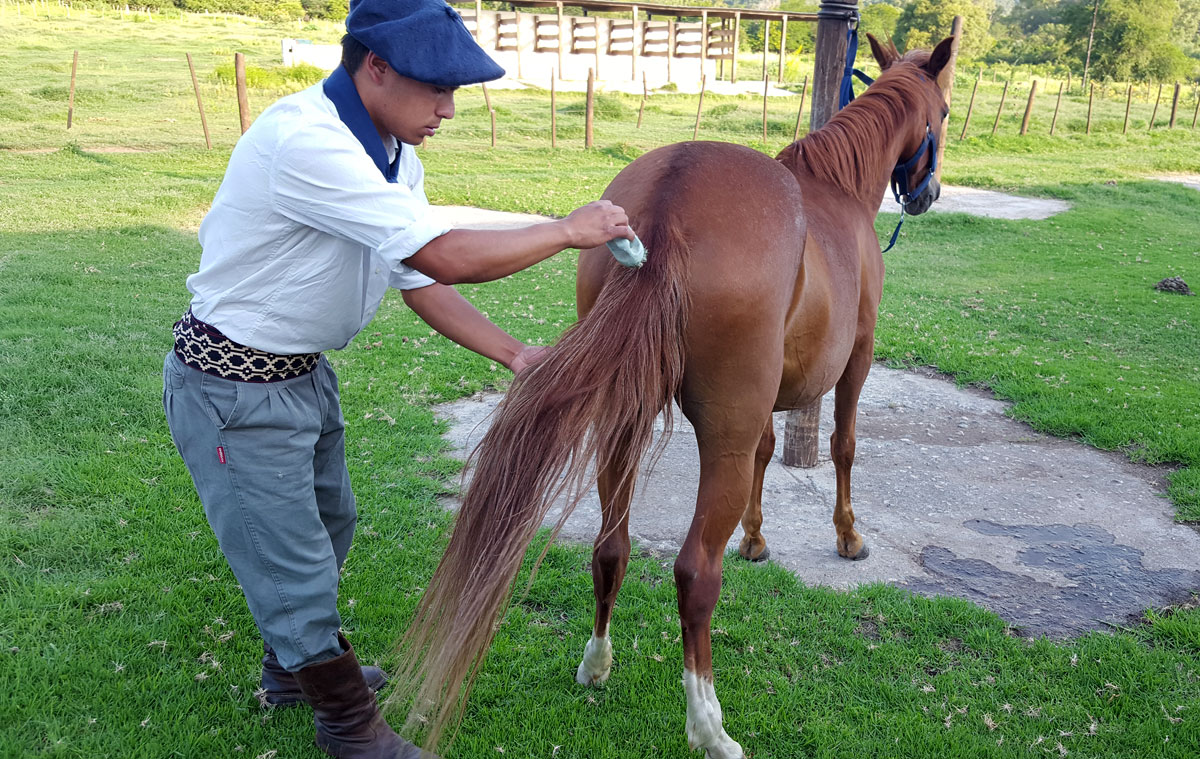
With a special brush, the horse's tail and mane are also detangled. In the case of the tail, this work is started from the bottom up so as to begin to detangle the less populated parts of the tail and mane. A horse that has had this work done looks exceptional.

Having carried out this general cleaning, we can now move on to cleaning delicate areas with damp sponges or cloths, such as the inside of the ears, checking that there is no foreign body present, or the areas near the eyes, which we should check to make sure there is no excessive tearing, redness or swelling.
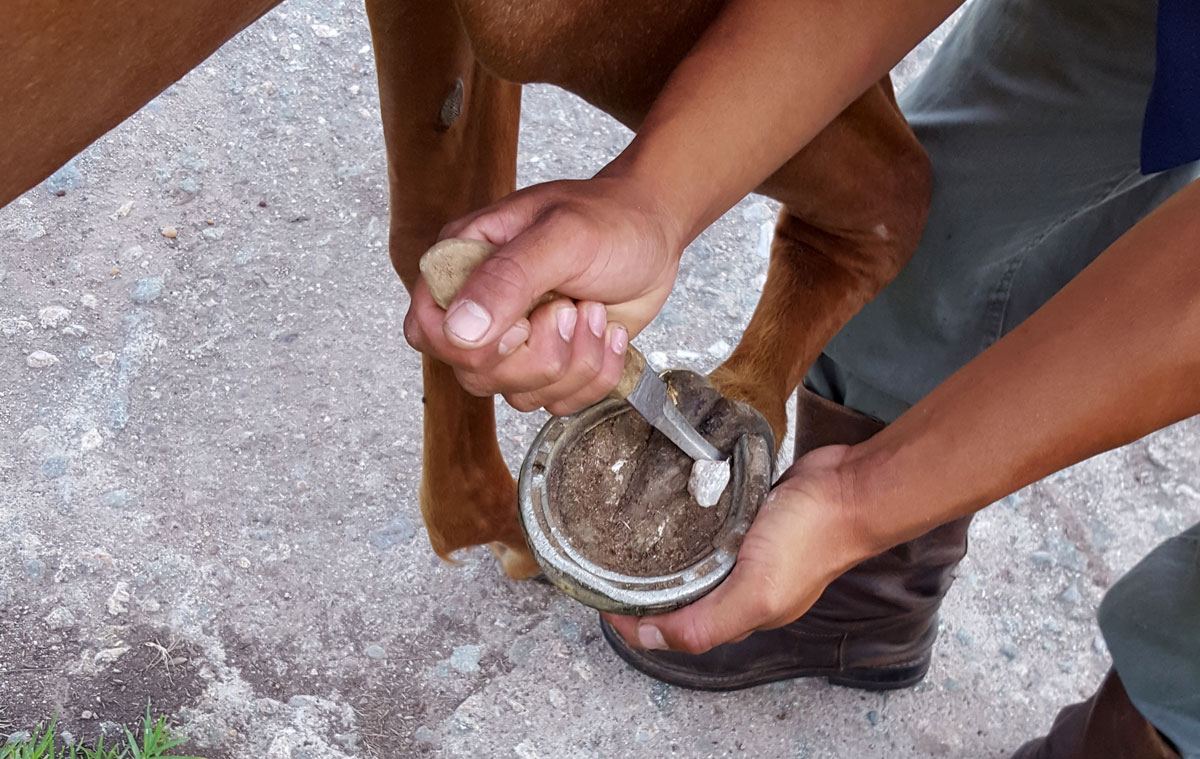
Finally, we must lift each of its limbs to clean the hooves of any mud or stones that may be stuck to the palmar area of the hoof and that hinder the horse's gait.
Hoof cleaning can be finished, if desired, with special tinctures or oils for hooves that not only enhance their color, but also serve to prevent the loss or gain of moisture.
This is a somewhat controversial issue, as horses in the wild do not have these oils or ointments and yet they have healthy hooves. The problem is when the natural state is altered and this is very difficult to manage.
At Ampascachi we believe that these ointments are only useful for aesthetic enhancement and for this reason we do not use them, except in very delicate cases or for treatment ordered by the vet or farrier.
2. SADDLE AND BRIDLE
You have already caught the horse and led it to the place where you have tied it and cleaned it, now all that remains is to put on the saddle and the bridle, so that you can ride it.
The saddle
There are many types of saddles and bridles, perhaps the most popular are the English saddle and the Western type (used by the cowboys of the American West), but there are also Spanish, Portuguese, and in South America, Peruvian saddles, Argentinean recados, etc.
The way it is placed on the horse's back follows the same principles of correctly securing the saddle to the horse's back, to avoid accidents and also to prevent damage to the horse's back.
As we have said, it is important that someone teaches you how to saddle and bridle a horse, which is not difficult. When you do it for the first time, you will quickly get used to it as you gain practice.
Saddles, whatever their characteristics or type, always consist of the following elements.
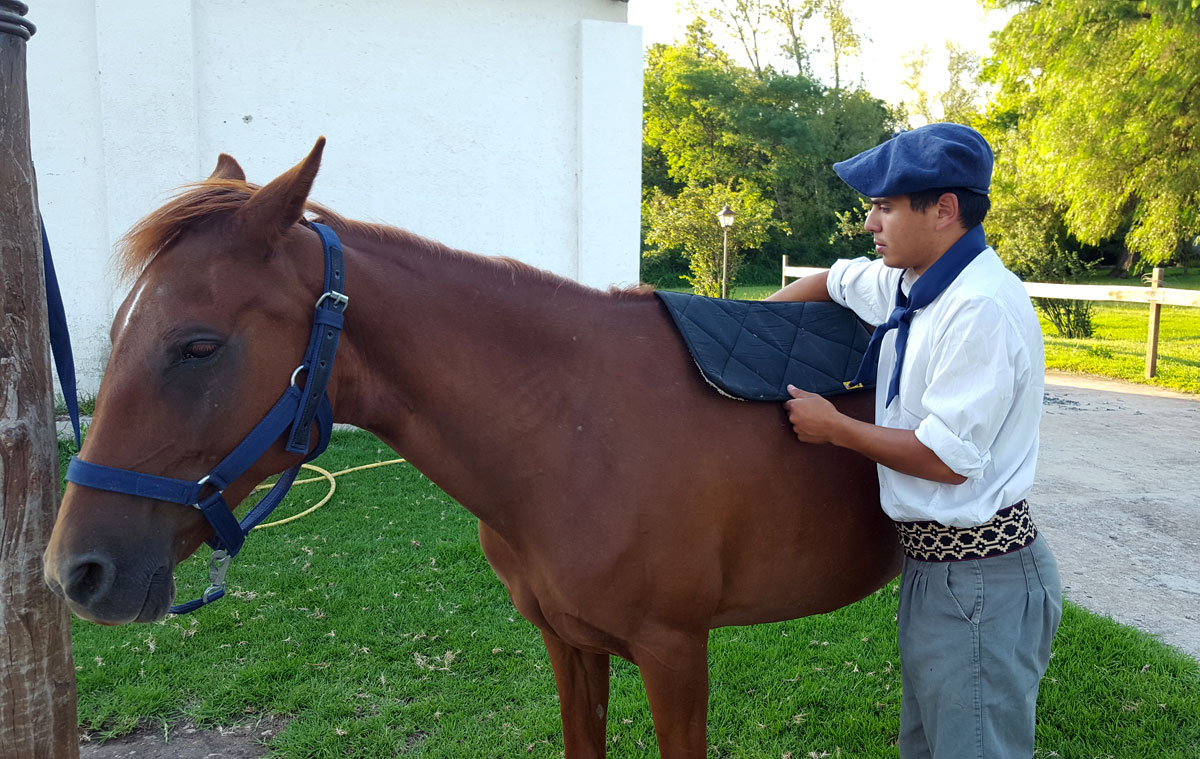
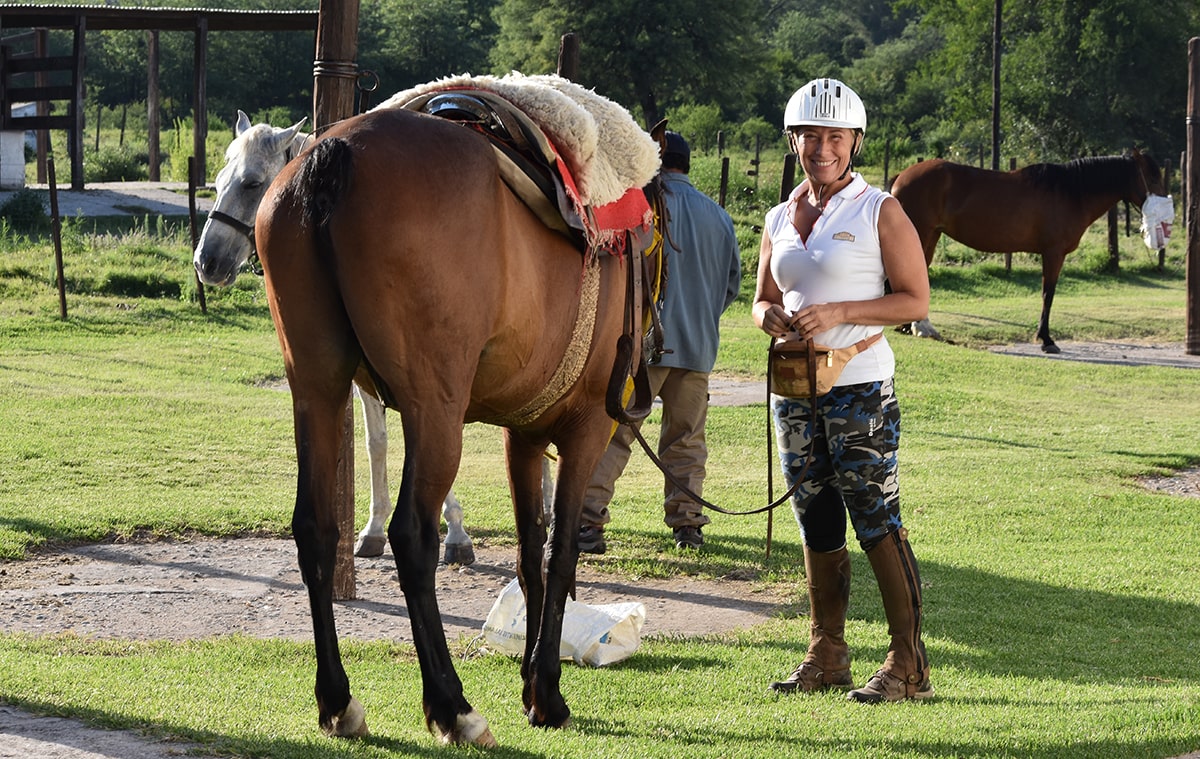
- The saddle cloth or saddle pad, which is a padded blanket that is placed directly on the horse's back (remember that the back must be completely free of any rubbish or grains of sand). There are different types, but their purpose is to cushion the impact of the saddle on the horse's back muscles, to prevent friction that can cause injury, and also to absorb the horse's sweat. They come in different thicknesses and materials, as well as different shapes.
- The saddle itself, which can be made of leather covering a wooden structure or shell, although nowadays the wood is replaced by other lighter and more moldable materials. The saddle should always be able to keep the area of the horse's spine free or out of contact, especially in the area where the rider sits, also to keep that area, which has no muscles, free from friction that causes bruising.
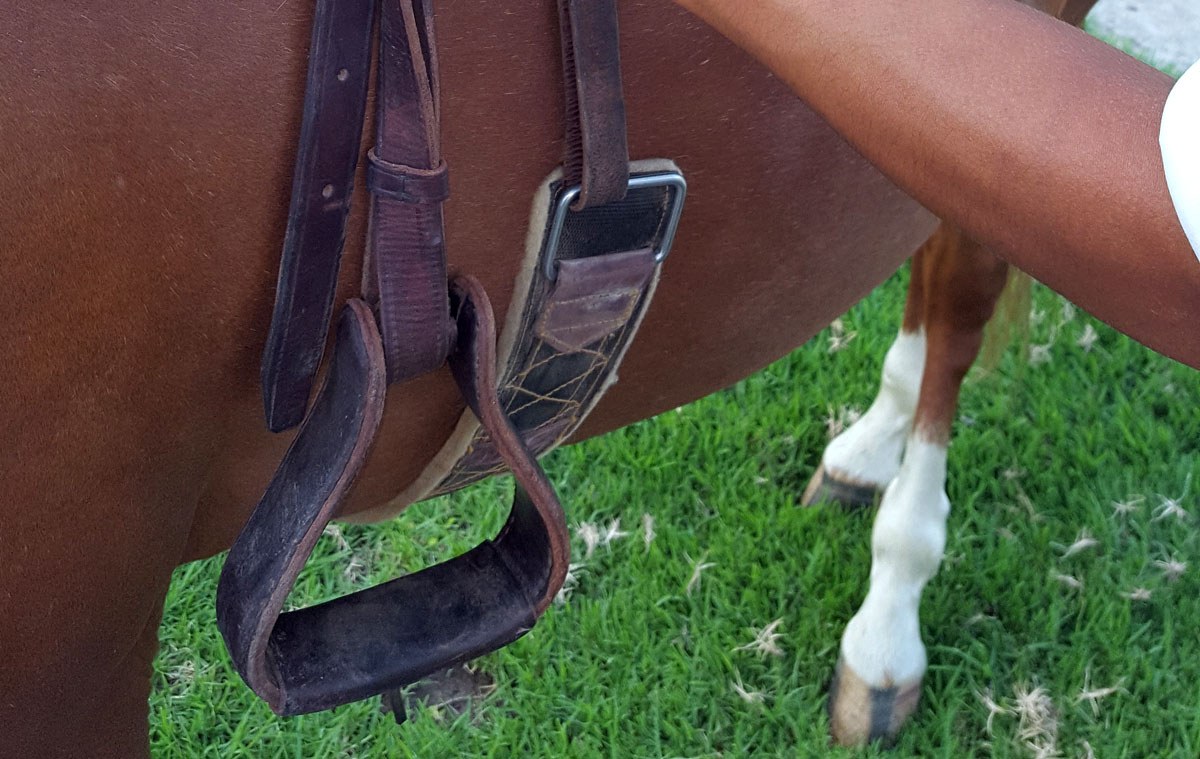
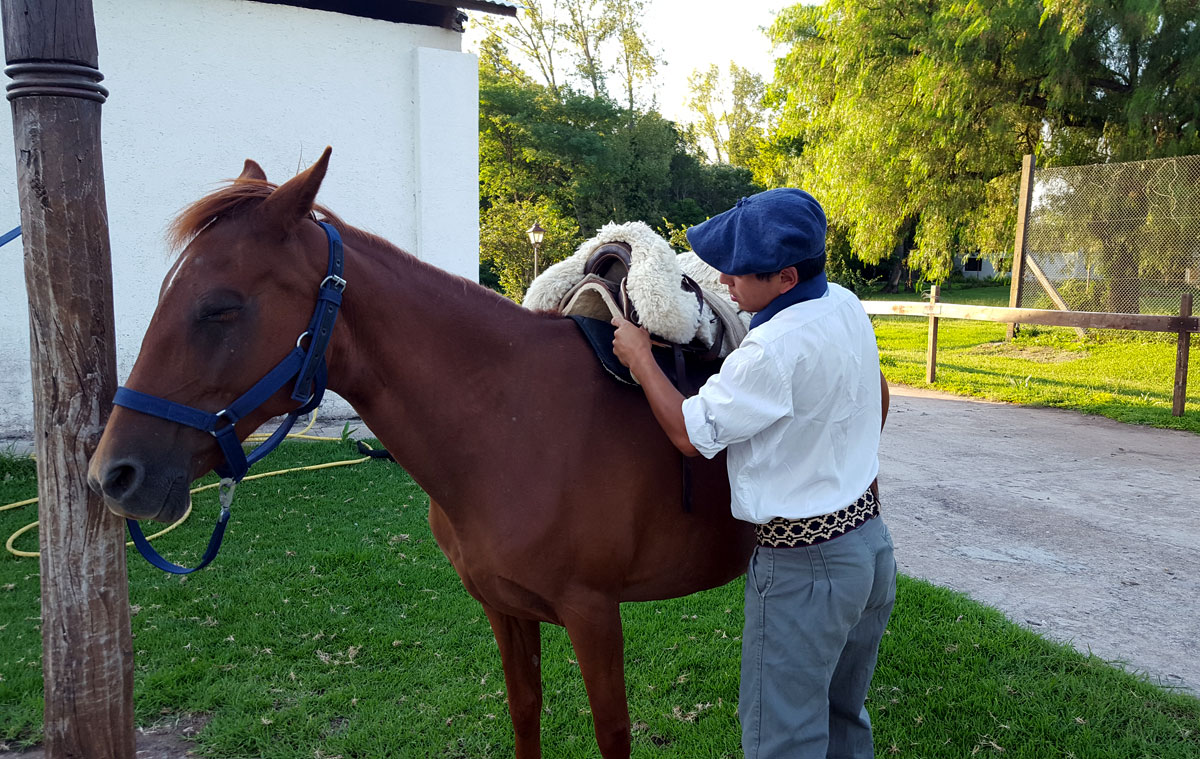
- Attached to both sides of the saddle are the stirrups, to which the stirrups are attached, and the girth, which is made of leather, twine or felt, among other materials, and which is used to attach the saddle to the horse's back and is attached to the saddle (in different ways) on one side only.
Having explained the minimum set of elements that make up the saddle, we will now look, in a very schematic way, at the process of fitting the saddle.
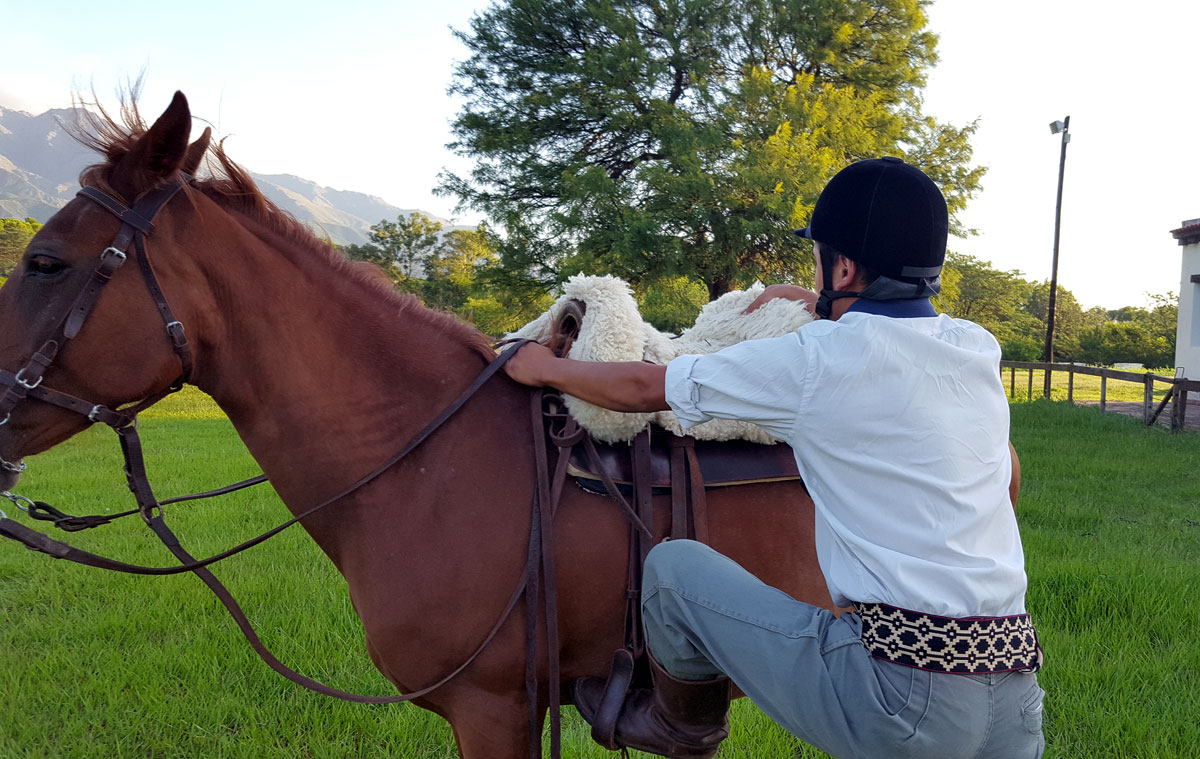
With the horse tied, as we said, and standing on the left side, you generally proceed to put the apron or sweatshirt over the horse's back, covering it from the area of the withers and backwards. You then move this blanket or apron backwards from the withers, making sure that the horse's hair is smooth under it. You must make sure that the blanket falls over the sides of the back to the same length on each side.
You will then place the saddle on top of this blanket, making sure that the blanket is always underneath and that no part of the saddle touches the horse's back directly.
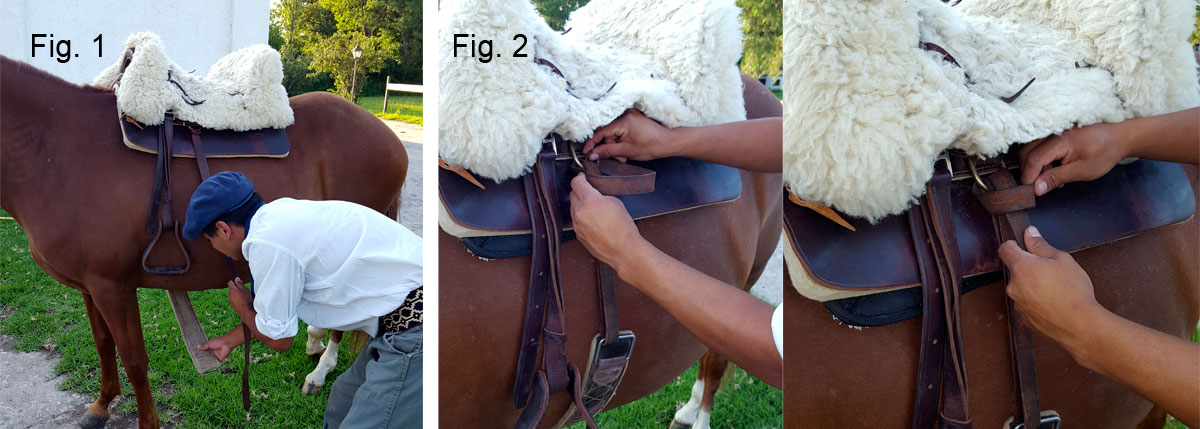
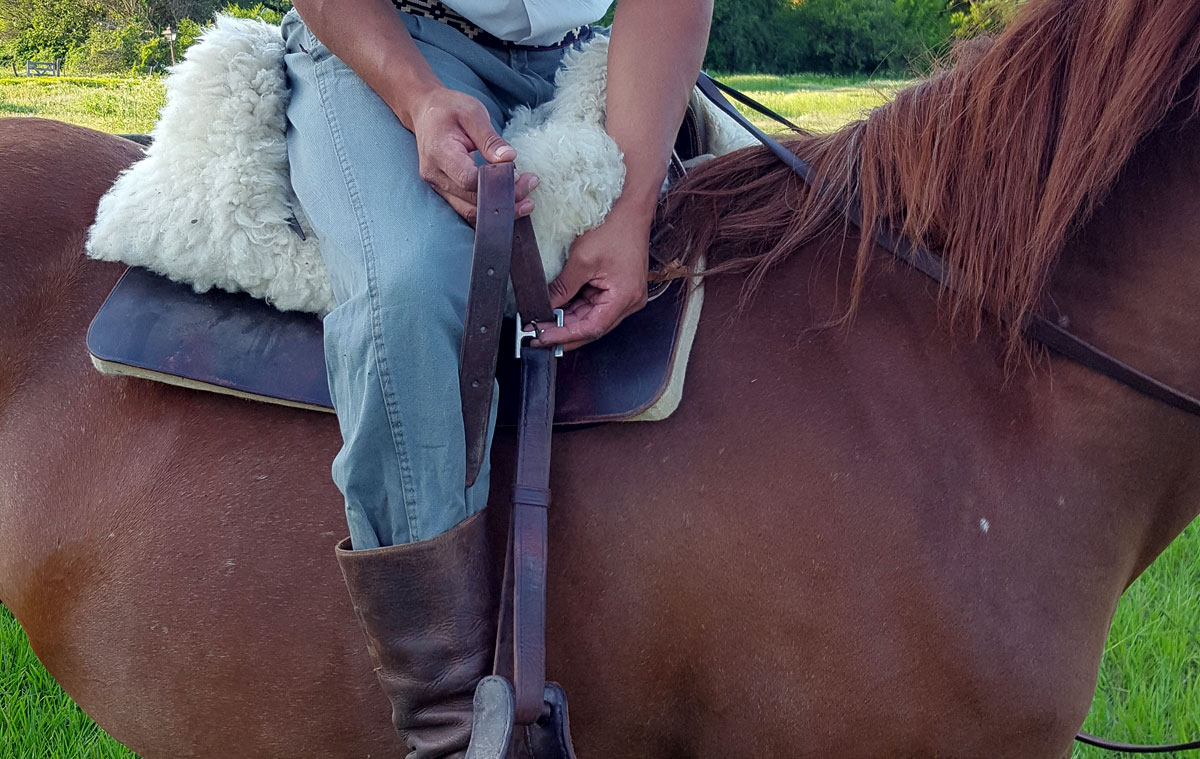
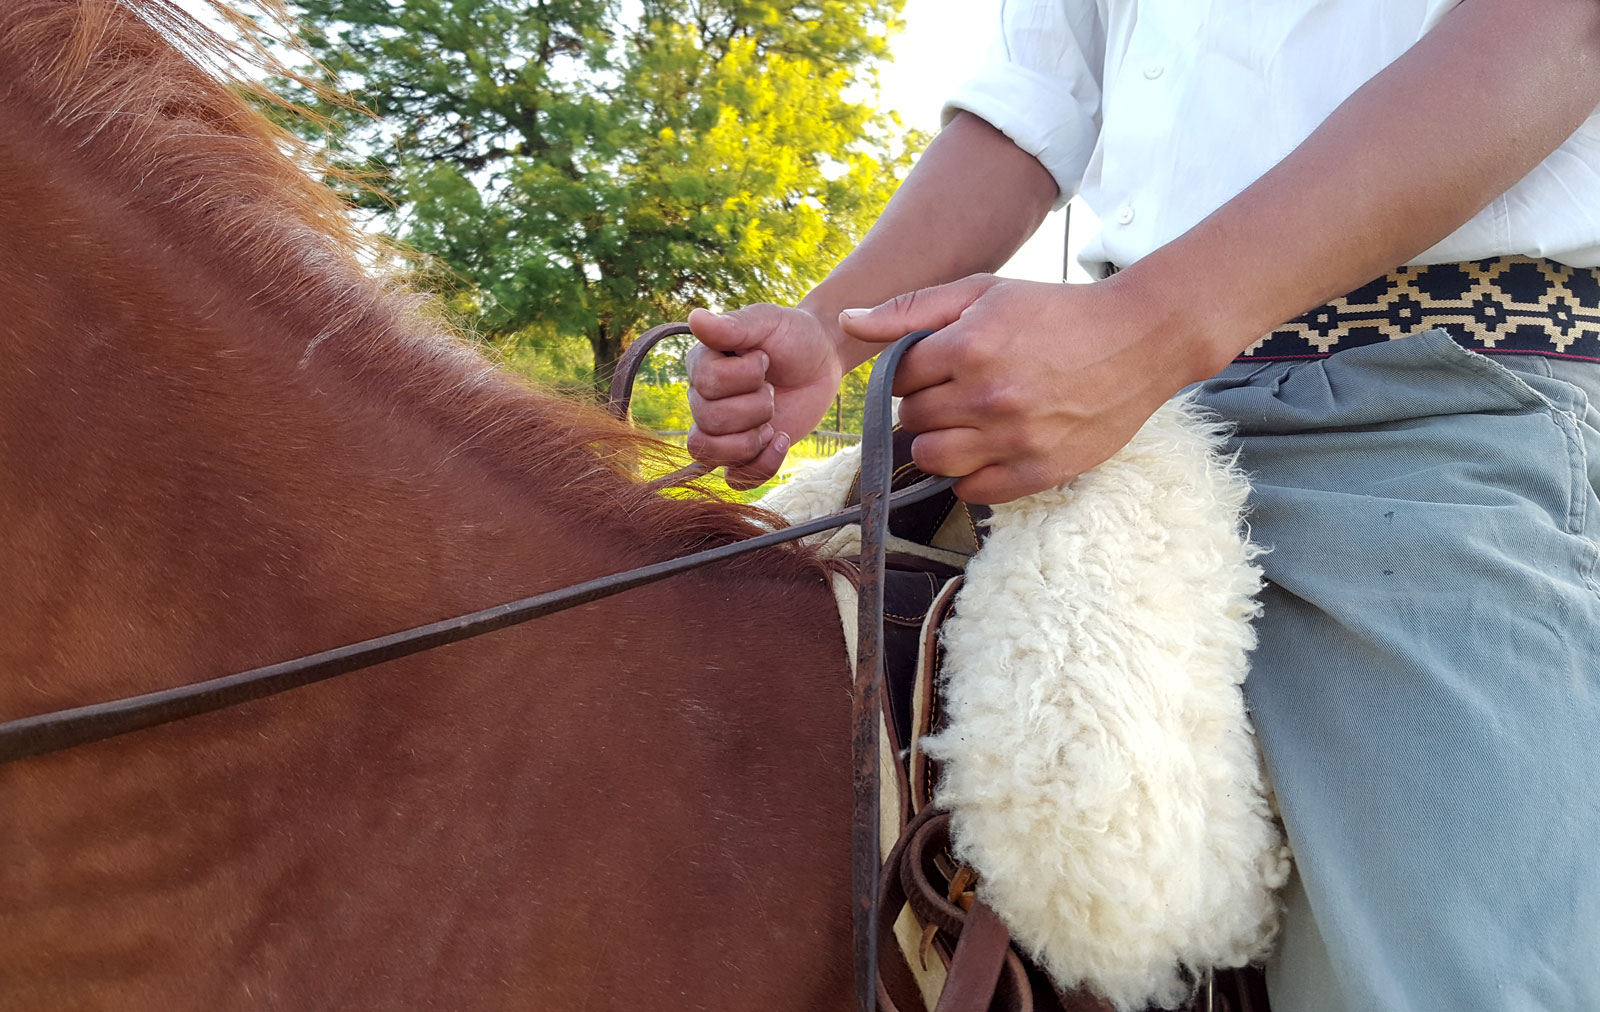
Once the saddle is placed on the horse's back, you will proceed to secure it to the horse using the girth. To do this, you will carefully pass your hand and arm under the horse's belly to take hold of the end of the girth that will be hanging from the other end of the saddle towards the ground (Fig. 1). Once you have it, you will pass the leather strip or sole that it has (depending on the type of girth) through a metal ring on the saddle and you will adjust it until you are sure that the saddle will not move sideways when you lean on one of the stirrups. The way to adjust and fasten it depends on the type of girth and saddle you are using (Fig. 2).
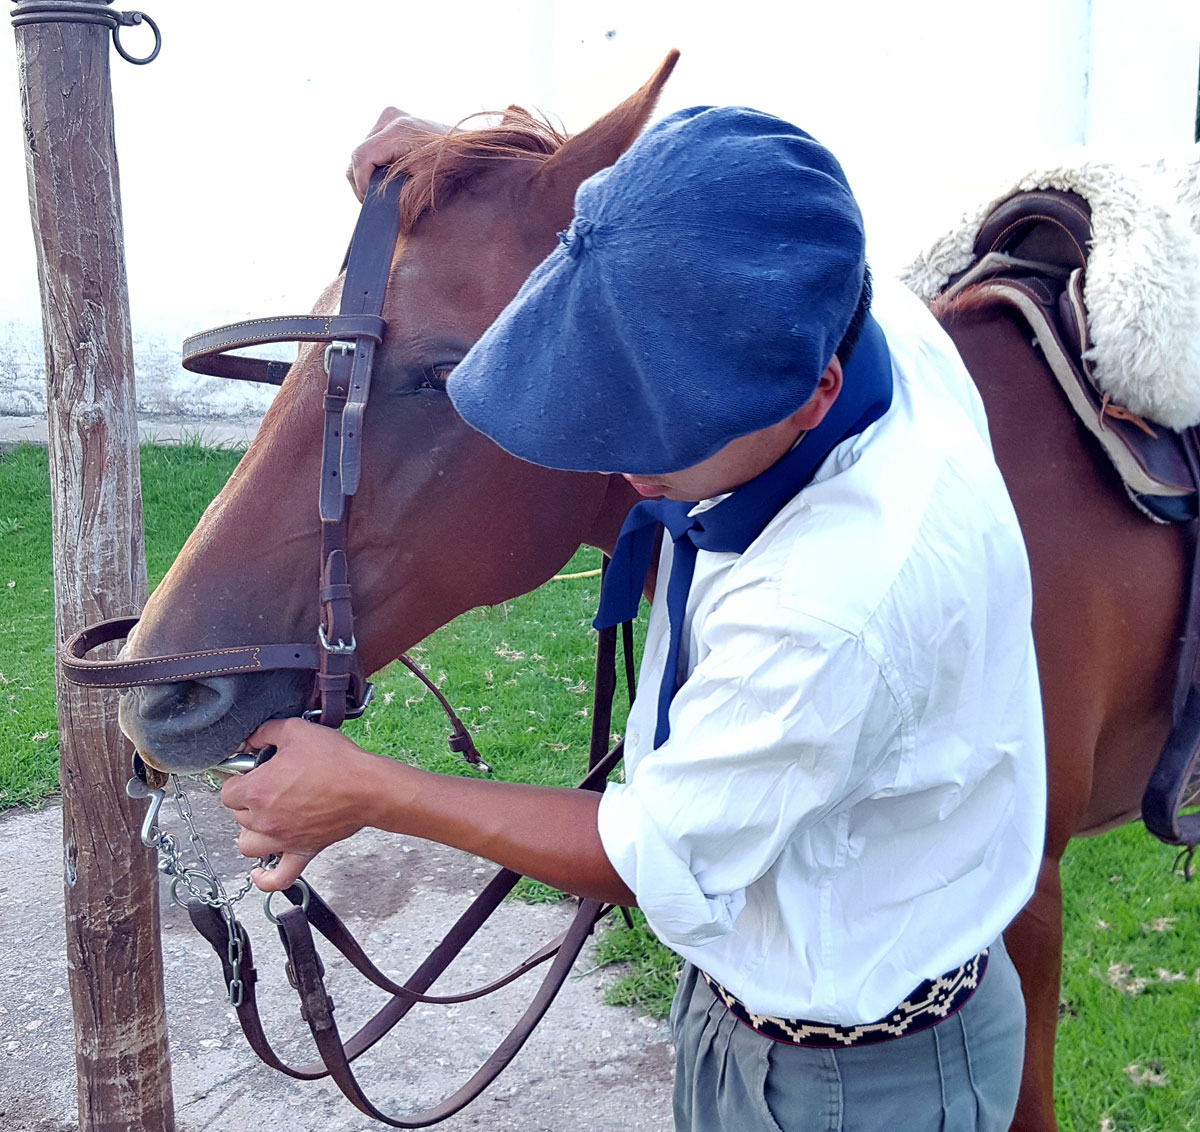
The bridle
The bridle is a set of straps that, attached to the bit or bridle, is used to hold the horse's head. The reins are attached to the bit and the rider can guide the horse using them.
Putting on the bridle is also an easy maneuver, but it requires that you practice it with someone to guide you. To give you an idea, here's how to do it:
Take the bridle by the top part or headpiece with your right hand and the lower part, which holds the bit, with your left hand. Standing on the left side, try to insert the bit into the horse's mouth, using the same hand that holds the bit to make the horse open its mouth.
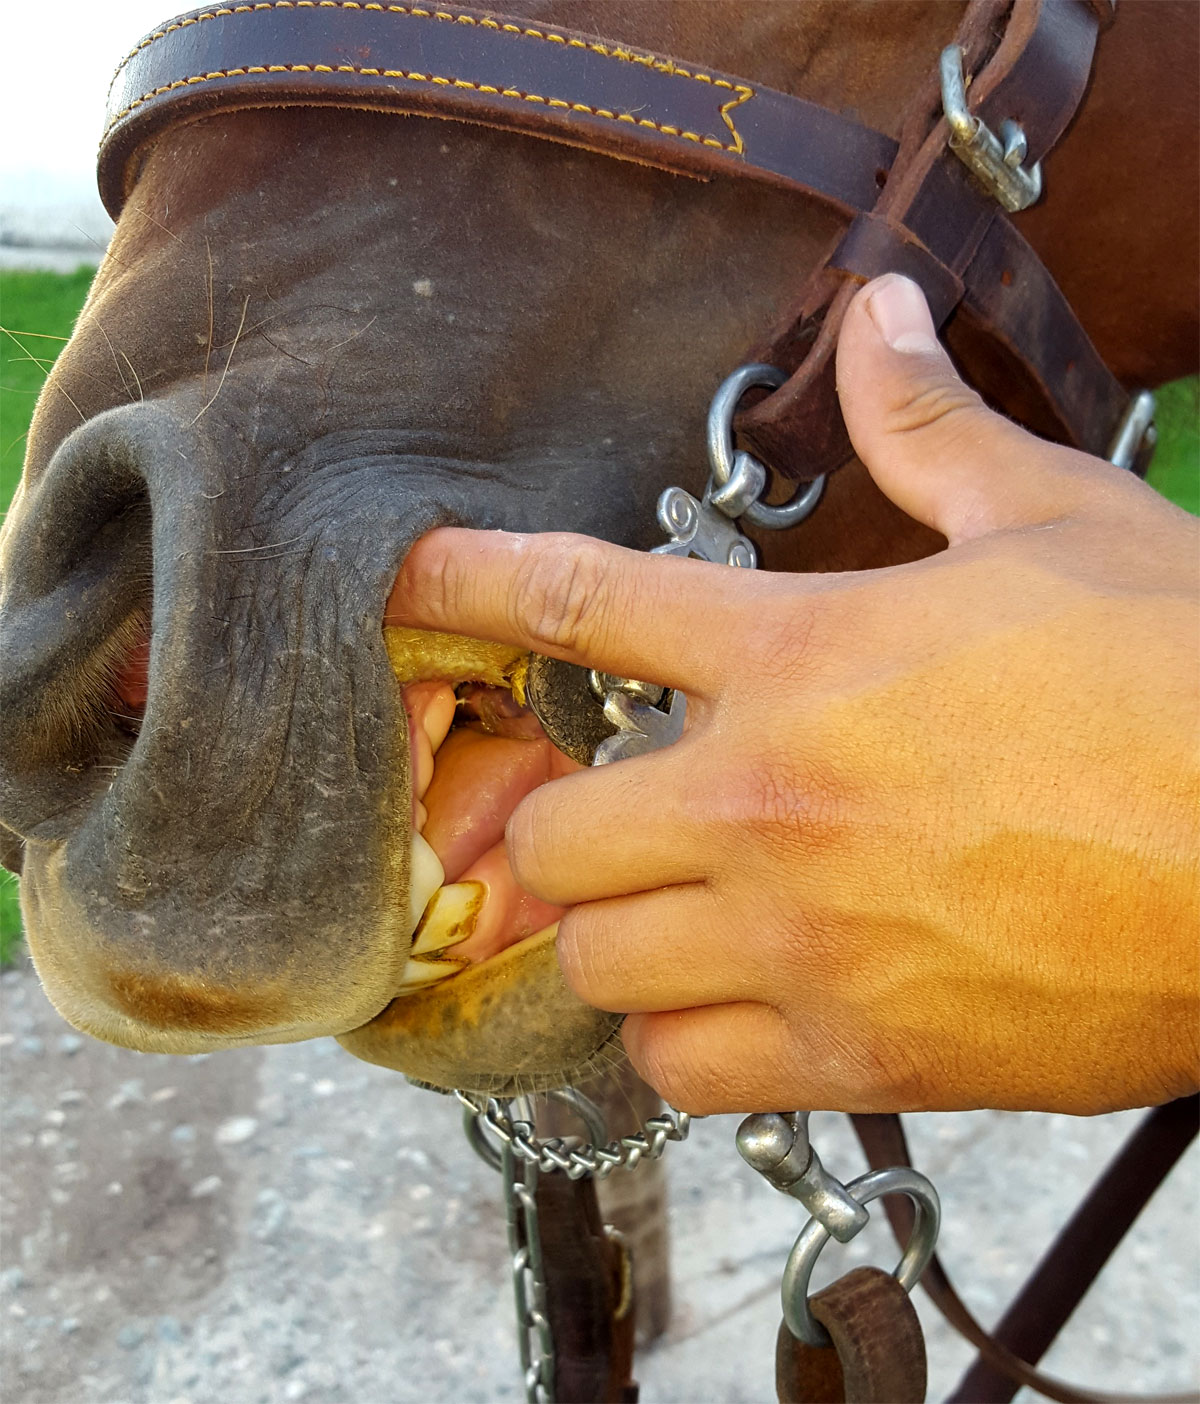
If the horse is well broken in, as soon as you place the bit on the teeth, it will open its mouth to take the bit and then with your right hand you proceed to put the rest of the bridle behind the horse's ears.
The bit should always be above the horse's tongue and you should adjust the rest of the bridle so that the bit is over the part of the jaw that has no teeth and before reaching the molars.
The maneuver of adjusting the bridle must be done carefully so as not to raise the bit too much inside the horse's mouth and touch the molars and also hurt the corner of the lips.

3. GETTING ON THE HORSE AND SITTING IN THE SADDLE
Here we will briefly explain how to get on and sit correctly in the saddle.
Getting on the horse
This is a relatively easy action, we are going to give an explanation for the case of a medium-sized horse. If the horse is very tall, you may need a stool to get on it.
As this is the first time you are riding, it is advisable for someone to hold the horse at the front by taking the reins, as always: “Someone should be instructing you”. The steps to follow are as follows:
The horse is saddled and it is best to take it out of the stable, as an open space is preferable for riding. Check that the girths and straps are all tight, that the stirrups are the right length and that you are wearing a helmet. With your left hand you take the reins and a strand of the horse's mane.
With your right hand take the stirrup to adjust it and place your left foot in it, making sure that the tip of the foot does not come into contact with the horse's side. It is preferable for the foot to be as parallel as possible to the horse's back.
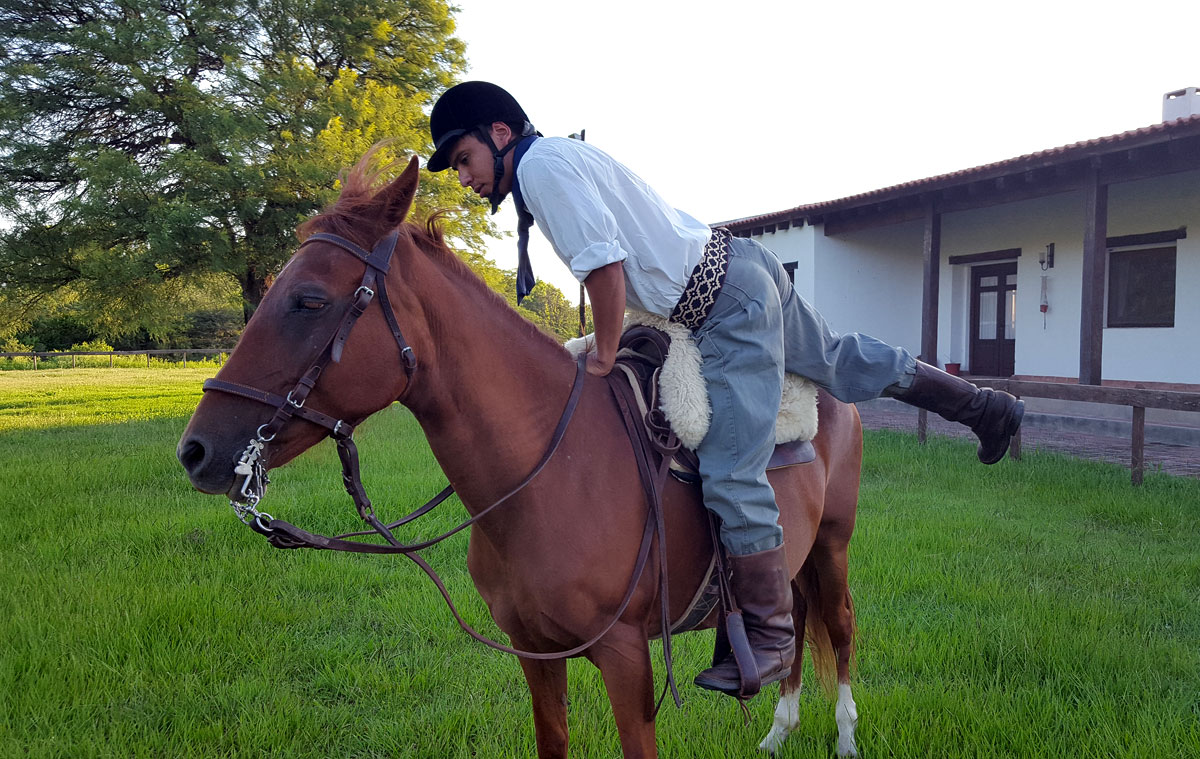
Then, with your right hand, take the rear borrén of the saddle and start to push with your leg on the stirrup to get up. This action requires a certain amount of effort, but if you start by pushing with your right leg, you will get an initial push that will help you. Never try to hang on or pull on the saddle, the force should be applied with your leg and once you are up, start leaning forwards towards the horse's neck and lift your right leg to step over the horse's hindquarters and sit gently on the saddle and place your right foot in the stirrup.
Next you should adjust your stirrups to the correct length for your legs, lengthening or shortening them. The person who was holding the horse can help you with this, and with practice you will be able to do it yourself, adjusting the length with the stirrup buckles. You will also take the reins correctly.
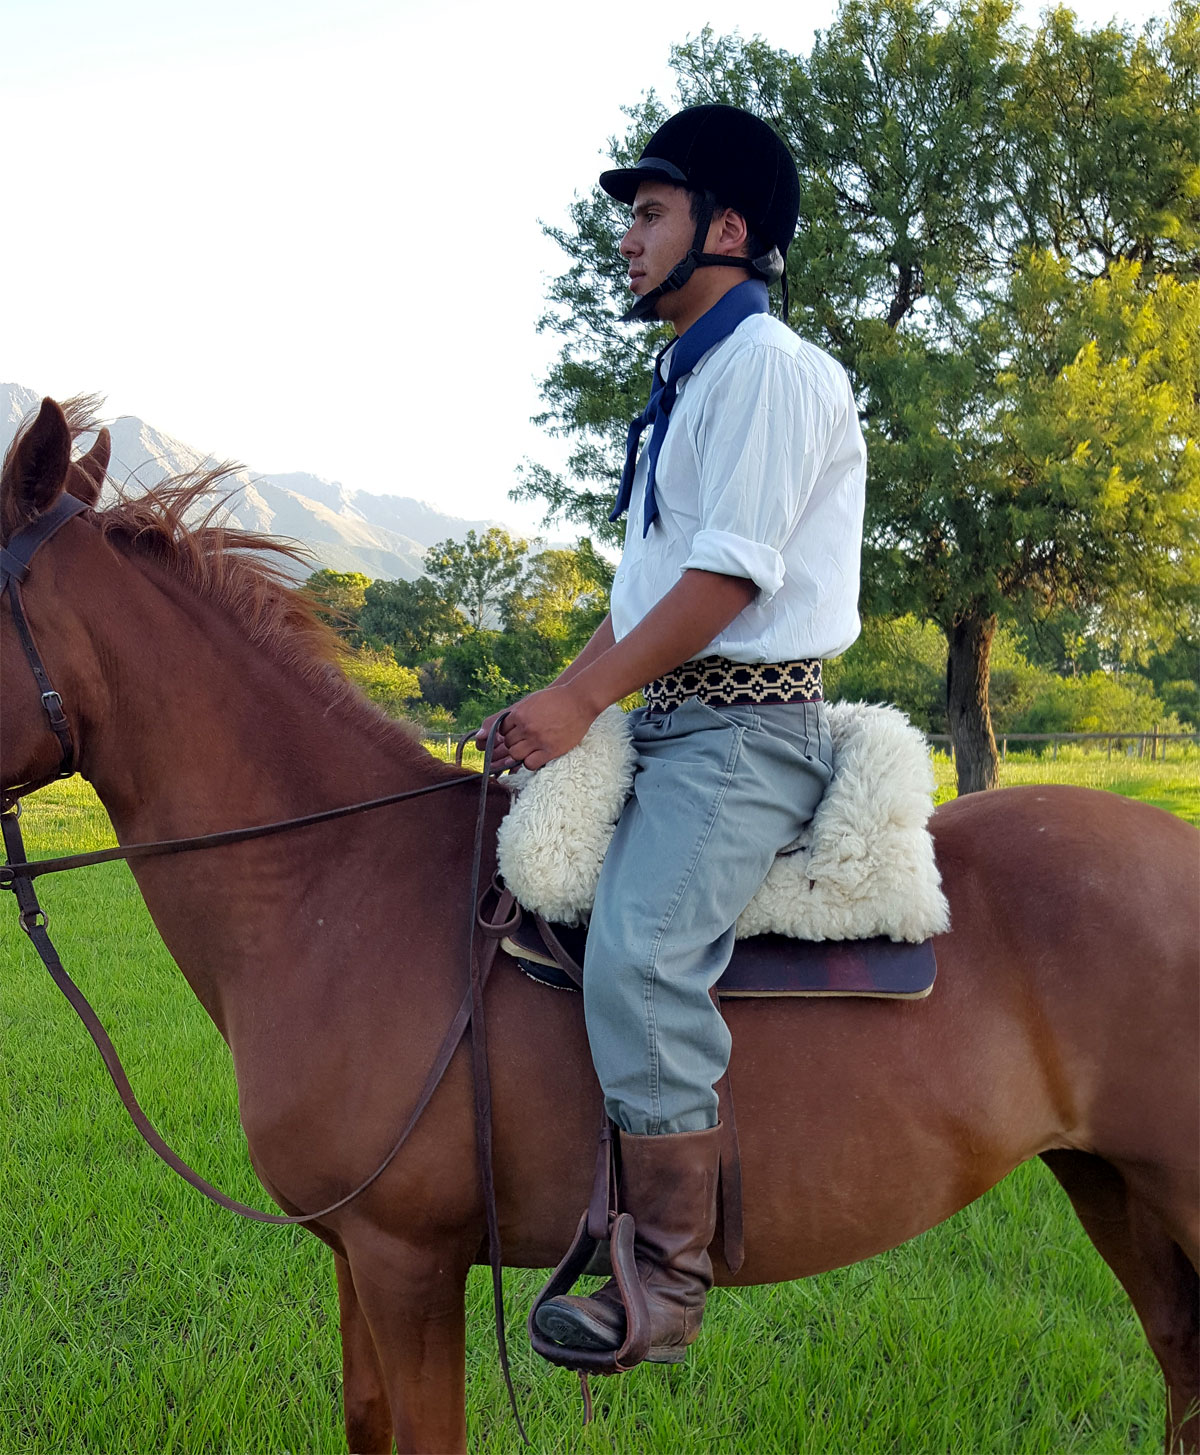
Sitting in the saddle is very important, because from a correct position you will be able to manage your balance, your seat and you will be able to follow the movements of the horse without unbalancing it.
We will give the first, but important guidelines on how to sit.
Riding a horse is a bit like dancing, you have to start from a correct but relaxed position. To do this, you should rest your sit bones comfortably in the middle of the seat of your saddle, your back should be straight and your shoulders should be straight, so you can find your own balance, starting from a relaxed posture.
Your feet should be in the wide part of the stirrups and your heels should hang slightly downwards.
The correct position is when you form a straight line that starts at your shoulder, touches your elbow and the tip of your heel, and your foot is aligned with your knees so that your knees are also in a straight line with the tip of your foot in the stirrup.
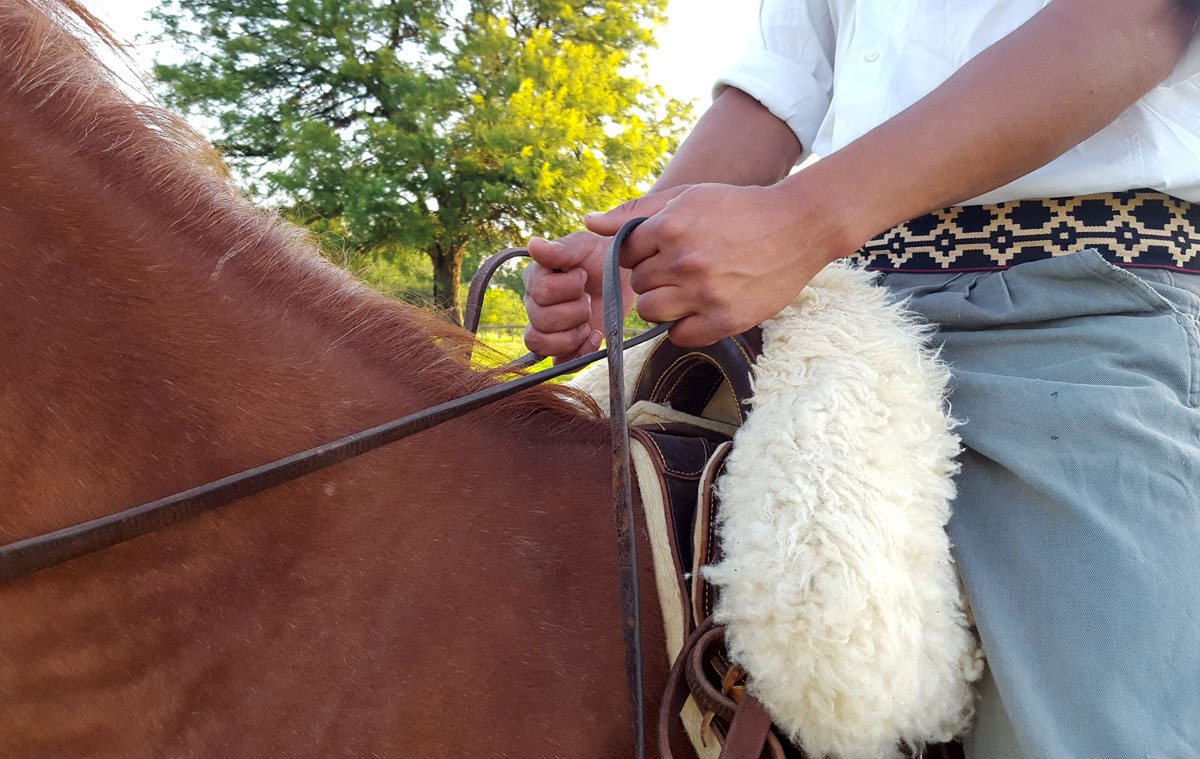
Take the reins, one in each hand if you are riding in the classic style. The rein should go over the little finger and come out over the thumb which, together with the closed fist, controls the grip on the rein. The hand position, with the thumb pointing upwards, should be relaxed and not rigid.
https://ampascachi-bucket.s3.us-east-1.amazonaws.com/media/blogs/imagenes/montar-caballo/montar-caballo-foto22.jpg/> Well, of course this is the beginning of these actions that you will perfect with practice, but as you can see, so far it doesn't seem that difficult. Starting to ride will give you great satisfaction, and if you do it and practice with joy, you will never stop doing it.
Part I ends here, but we continue in Part II, to follow with the basic principles for learning to ride a horse.
Comments (0)
No comments yet.


Comments
Leave your comment